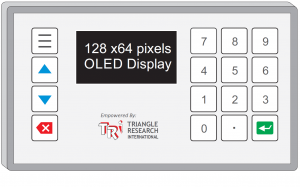
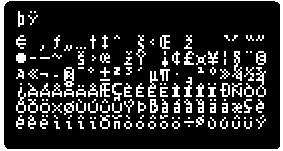
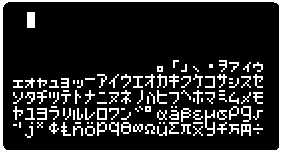
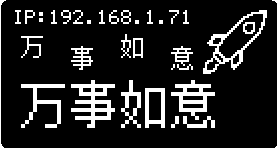
Besides displaying ASCII text and vector graphics via DRAW_XXX command, TBASIC is also able to display custom-designed bit map graphic block of up to 32 x 32 pixels. The procedure begins by designing the graphic using a special graphic editor software, then export the generated bit pattern as data points to be assigned to the PLC’s DM[n] variables. Finally, run the new TBASIC DRAW_BITMAP command to display the bitmap graphics on the OLED display. We will explain the procedure below.
 DRAW_BITMAP x, y, dmIndex, magnification
- x and y are the coordinates to display the bitmap character
- dmIndex is the starting index of the DM that stores the bitmap. It can start anywhere from
     1 to (4000 - number of bytes needed to represent the bitmap).
- magnification factor.  E.g. if = 2 means that the character is displayed at double the size.
      So a 6 x 8 character will be displayed as 12 x 16.
Using the DM is convenient as it allows you to load the characters either from EEPROM or from a data file or even from an online source and then deploy it as and when needed.
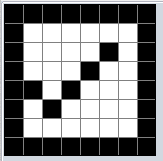
Now what do you store in the DM? If the bitmap is less than 8 pixel tall, then a single byte is used to represent a column of dots where a ‘1’ means that the dot is ON and ‘0 means that the dot is OFF
For example, the following graphics can be represented as an array of bytes (hex): &HFF, &H91, &HA1, &H91, &H89, &H85, &H81, &HFF

If the bitmap is larger than 8 but less than 16 pixel tall, then 2 bytes are used to represent each column. A 32 pixel tall bitmap requires 4 bytes to represent the column and as many 4-byte words as is needed to represent the number of columns.
E.g. A 12 x 12 pixel bitmaps as following :
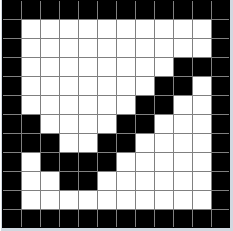

can be represented by &HFF, &H0F, &HC1, &H08, &H81, &H09, &H01, &H0B, &H01, &H0B, &H81, &H09, &HC1, &H08, &H61, &H08, &H31, &H08, &H19, &H08, &H09, &H08, &HFF, &H0F
Note: it is written in Little Endian format. So the leftmost column can be thought of as &H0FFF but is represented by the first two byte: &HFF, &H0F.
Likewise, second column should be &H08C1 but is represented by the 3rd and 4th byte: &HC1, &H08
.. and so on.
It will be a real pain to try to do this by hand but fortunately there is a free program call MicroElektronika GLCD Font creator which you can download from:
https://www.mikroe.com/glcd-font-creator
The program is meant for you to create bitmpa font for ASCII characters or Unicode characters. You can import some system font for simple graphics (e.g. WingDing) or create from scratch.
When creating from scratch you define the number of width and height for your bitmap and assign it a code number (you can use the 32 to 32 which is actually a space character but won’t matter. Then just use left click to draw pixels and right click to erase pixels inside the bitmap.
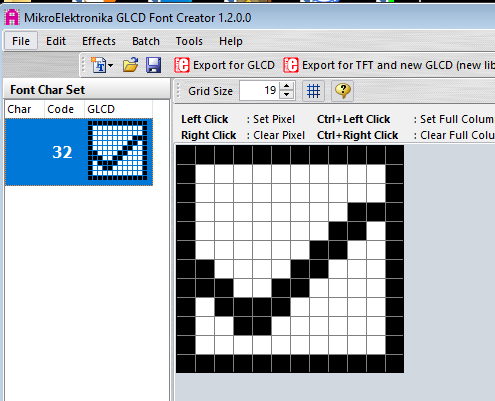
Once you are done with creating the bitmap, click on the icon on the left (the one next to 32) to SAVE the character
After you have saved the character, generate the bitmap data by clicking on “Export for GLCD” to generate the Basic, Pascal or C codes for the character bitmap.
If you click on the “mikroC” tab you see the following array. Discard the very first byte (0x0C as shown below) as we don’t use it.
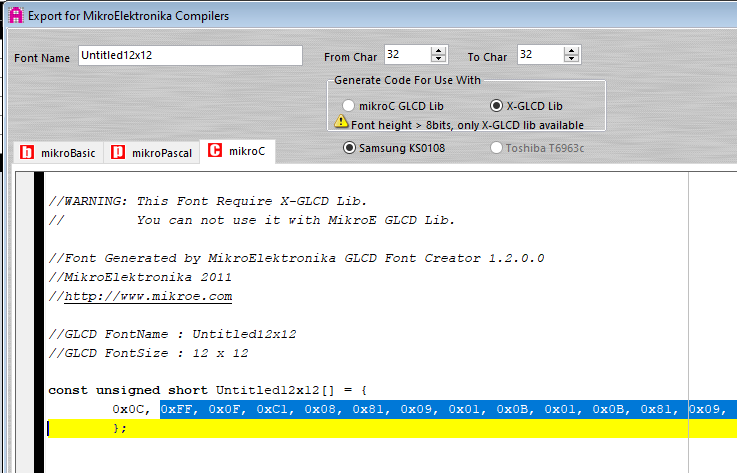
const unsigned short Untitled12x12[] = {
0x0C, 0xFF, 0x0F, 0xC1, 0x08, 0x81, 0x09, 0x01, 0x0B, 0x01, 0x0B, 0x81, 0x09, 0xC1, 0x08, 0x61, 0x08, 0x31, 0x08, 0x19, 0x08, 0x09, 0x08, 0xFF, 0x0F // Code for char
};
The data after the first byte will be what we want to fill in the DM array starting from DM[dmIndex + 4] onwards until the last byte in the array is reached.
You need to fill in DM[dmIndex] to DM[dmIndex+3] the following:
   DM[dmIndex] = 0   ' reserved, always 0
   DM[dmIndex+1] =   bitmap width in number of pixels
   DM[dmIndex+2] = bitmap Height in number of pixels
   DM[dmIndex + 3] = ' reserved, always 0
For example, in the 12 x 12 bitmaps example above, if we starts with dmIndex = 1
   DM[1] = 0
   DM[2] = 12
   DM[3] = 12
   DM[4] = 0
   DM[5] = &HFF
   DM[6] = &H0F
   DM[7[ = &HC1
   DM[8] = &H08
   ....
   DM[27] = &HFF
   DM[28] = &H0F
Now if you run
DRAW_BITMAP 0, 30, 1, 1
it will draw the bitmap checkbox graphic at coordinate x = 0, y = 30 with x1 magnification.
Note: Please download the following example program that shows the creation and display of custom bitmap graphics:
https://triplc.com/TRiLOGI/Examples/Wx_Specifics/DisplaytExtendedAscii_And_Custom_Bitmap.zip
